Vinyl Siding 102 – The Details of Installing Vinyl Siding
Installation of Vinyl Siding
Preparation:
- Before installing vinyl siding, the existing exterior surfaces must be thoroughly cleaned, and necessary repairs should be made.
- The installation area is measured, and the appropriate amount of siding is ordered.
Starter Strip Installation:
- A starter strip is installed along the bottom of the exterior wall to provide a level base for the first row of siding panels.
- The starter strip is secured to the wall, ensuring it is level and properly aligned.
Siding Panel Installation:
- The first siding panel is installed at one corner of the wall, starting from the bottom and working upwards.
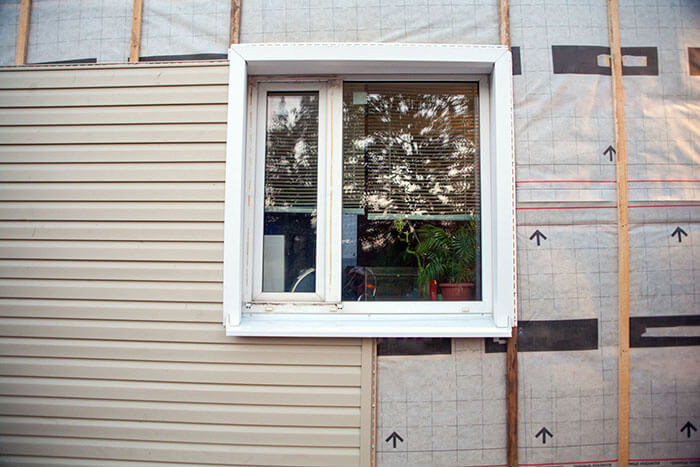
- Each subsequent panel overlaps the previous one, interlocking with it.
- Nails or screws are used to secure the panels to the wall, leaving a small gap for expansion and contraction.
Trim and Accessories:
- Trim pieces, such as corner posts, J-channels, and soffits, are installed to provide a finished look and cover edges.
- Accessories like window and door trim, shutters, and vents can be added for additional aesthetic appeal.
Finishing Touches:
- Once all the panels, trim, and accessories are installed, a final inspection is conducted to ensure everything is properly aligned and secured.
- The vinyl siding is typically cleaned using a mild detergent and a soft brush or cloth to maintain its appearance.
Conclusion: Vinyl siding is a versatile and durable option for enhancing the exterior of your home. By understanding the manufacturing and installation process, you can make informed decisions about its suitability for your needs. Whether you’re considering installing vinyl siding yourself or hiring a professional, this guide provides a comprehensive overview of the steps involved in bringing vinyl siding to your home.


